Showing posts with label projects. Show all posts

Monday, 19 May 2014

Woolly Wrestling


I was told of a new wool shop in the nearby town so set off on my trusty bicycle (the tyres managed to stay up - in my book that is trusty) along the glorious flat promenade with the expectation of wooly wonders to behold. Yes I do get the irony, wool is a odd obsession in the sunshine but then I make no claims to be level headed and logical! 

The shop itself was a hobby store, which is wonderful but the wool section merely had a few balls of very cheap wool. I wanted some angora as the jumper I am knitting is eating the wool at rather a fast rate and I may only really have enough for a tea cosy! I asked the shop owner about other types of wool and she told me that sadly it just did not sell - her customers just wanted the cheaper balls. 

It took me back a few years when I remember standing in John Lewis which had some fabulous wool for sale - my simple calculations estimated the cost of a jumper to be in the region of £80 at the time it was beyond my budget. I remember my frustration - surely they must realise that you can buy a jumper in a store ready made for about £30 what were they thinking? 

Now my opinion is beginning to shift - I have become disconnected with the making process and my value system is based around the cost of buying something in the shops, often made in countries where wages are low - I am beginning to wake up to how much it has warped my values and my expectations. I see rails and rails of clothes and jumpers in charity shops, worn for a season or two then simply discarded, if it costs us so little then why on earth would we value it? Yet our resources are not limitless - we need to understand where this direction is headed. If all our money is being spent in shops -eventually we will lose our ability to make anything, skills will disappear - we will become dependent and ultimately at their mercy. Moreover, we simply cannot sustain this concept of throw away that pervades everything we buy from bread, clothes, through to white goods and furniture. 

It is not a fast easy process to create wool, it needs to be teased, spun and dyed that means hours of work by someone and it is my choice to decide if that someone is sitting in a factory in a third world country or a farmer's wife making extra money to make ends meet in the UK. 

I get a great deal of satisfaction from creating something with love, care and consideration, why not then have the same reverence for the raw materials? How much nicer it would be to wear something that had been lovingly made from sheep to my fingers - something that would be treasured for years to come. If I wear my jumper for eight years then it will only amount to £10 a year - it brings the cost into a more realistic amount. 

For me, knitting is a sensory experience - I made an item with some of this £1.99 /100g wool - it was a waste. The garment simply did not feel nice to wear and knitting with it was not pleasant either. I spend a great deal of time in wool shops touching the wool - I want something soft and comforting next to my skin and if it is comfortable to wear then I won't be parting with it easily. 

Here is sneak peek at what I am making, what you cannot do is feel how wonderfully soft and downy it is. I will do a post about fair isle knitting and patterns soon. In the meantime happy knitting! 


Saturday, 29 March 2014

Easter Gift Giving Decoupage


I am not sure where I get it from but I cannot bear to throw things away especially bottles and jars. I have agreed to run a decoupage evening for the Felpham Belles and wanted to do a more useful alternative to the usual egg decorating. Hence this little project was born.


  • Simply make sure you wash the jars out well - clean the outside with alcohol or white spirit
  • Decide how far up your jar you want your pattern to be and then put a thin layer of white acrylic paint  up to that point. Allow to dry. 
  • Take your napkin and carefully remove the top patterned layer from the white, this will give you a very delicate patterned paper. (you can use the decoupage papers if you prefer)
  • Use Deco Art Patio Paint and a soft brush to gently apply a thin layer to a small area that you wish to cover. 
  • Then lay the thin layer of napkin gently across the small patch of wet paint using the soft brush to slowly glue it to the surface. 
  • Work round your item - small patches as you go, until the item is covered.
  • Leave to dry. 
  • Apply a layer of clear varnish to give a really good seal. 
  • Add buttons or ribbon as desired with a hot glue gun


I think they make great gifts that can be filled with a variety of things from little chocolate eggs to ready made cookie mixes, spice mixes or haberdashery items. 


Of course it all starts with the right type of napkins, and this variety gave me a lot of patterns in one napkin. I added the pen marks to indicate stitching for this little patchwork jar, adding a little button on the top. 


I enjoyed using jars of different styles too, they seem to lend themselves to different designs. 

The wish jars are made by painting the jars with PVA glue in which you have mixed glitter. The finer glitter gives a better finish. 


As you can see I have used darker clouds at the bottom of the jars, gradually using lighter glitter until the top of the jar has silver. 


Once the jars were nice and dry I applied the butterfly decoupage around it. I think it looks as if the butterflies have just landed on the jar. 


I used a nice coloured napkin for the top of the jar and placed another butterfly on the top. 
Outliners come in a variety of colours, but I felt the white worked best for the word Wishes. 

I hope the class goes well. 

Monday, 20 January 2014

Out in Downton Style


Not only am I a fan of hats, but I admit to feeling somewhat envious of the glorious hats worn in Downton Abbey. With the winter upon us, I found this little wonder hiding on a very high self in an vintage shop, it was the perfect shape for a project I had in mind, but it was a little plain. 


You can purchase pins in these beautiful little plastic holders, but they make brilliant templates to make ribbon flowers. You simply decide on your spacing, I usually decide this by the width of ribbon I am using. 


Attach the end of your ribbon with a hot glue gun to a large button placed at the centre of your circle of pins.  Press lightly and hold until the glue has cooled slightly.


Wrap the ribbon around the pin and then glue as it crosses the centre, directly over the spot where you started. 


Continue wrapping the ribbon round the pins, and fixing the ribbon in the centre, until you have completed the circle. 


Glue another decorative button over the centre of the flower and remove the pins. You will be able to remove the flower from your pin circle. 


Decide where you wish to glue the ribbon around the hat, and working slowly glue every few centre metres along the edge. Press down lightly and wait for the glue to cool before moving on to the next spot. 


Glue the ribbon in place and there you have it! 


A gorgeous hat with ribbon trim, all you need now are the army of servants to carry your shopping! 

Wednesday, 13 November 2013

When the red red robin goes bob bob bobbin along!


It was while out on one of my dog walks recently that I noticed just how charming ivy is: the leaf shapes are so elegant, the deep rich green with its darker veins are so pretty creating a lovely patch of  green while all around me the trees are becoming bare. I love the way it flows and softens the lines of the fence where I was walking - the way the leaves grow smaller along the vine. I also spotted some gorgeous variegated ivy in my own garden! 


Nature always has beauty, no matter what the season - frosted ivy was a wonder to behold. It has been there all year, but my focus has always gone to the scented lavender or the bright geraniums, but at this time of the year I begin to see the structure and beauty of those plants who remain the supporting cast in the garden. 


I was inspired by my walk to create a winter wreath, and decided to give ivy the star treatment! 


I really enjoy using needle felting as it allows me to create more realistic natural patterns, I combined them with the multitudes of tapestry wool -I purchase in vintage shops - often a whole abandoned kit can be bought for as little as a few pounds - I keep it in a small suitcase that resembles a box full of colour! 


Christmas Roses or hellebores, are so lovely too - but overshadowed most of the time by the more colourful varieties. However, they flower when winter has its grip and june roses are a distant memory or promises of summer to come while the branches of the roses look stark like winter skeletons of summer plants. 


The robin adds a splash of colour to the wreath, alongside some small red berries. He is created with a combination of felt, wool and merino floss.

It is easy to use the wool to create the wings on the robin, laying them across the body, using the felting needle to fix it. The beaded eye gives a brightness to the robin and gives him a little sparkle.

The felting gives a fluffiness that gives the robin his plumage, and softens his shape a little.

As you can see some of the ivy leaves are simply cut - with the variegation created with simple use of a felt tip pen!

I also laid several different colours of wool to make up the vines of the ivy, fixing all the elements with a hot glue gun. The leaves lay across the wreath, using a pen to push the centre of the ivy leaf to give it a natural shape.

If you want to have a go yourself you can purchase the wreath here, they are from Gisella Graham who I really love. Heidi feathers does a great beginner felting pack here which includes everything you need to start creating your own wreath. If you would like pattens for the ivy leaves and robin just drop me a line or you can sign up for the course I am running at Clothkits on Saturday 30th November.  

Monday, 28 October 2013

Cable tied duo


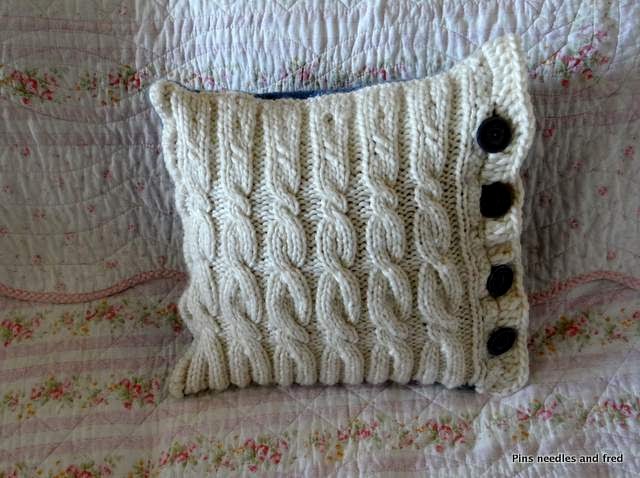
I have completed my cable cushion! I love the texture that can be achieved by knitting, it is astounding just how many variations of pattern that can be made with two simple stitches. 


I used a very chunky yarn, in soft pale cream - it was satisfying as the knitting grows so quickly! I did not manage to copy the pattern, rather making my own using the technique. 


I chose to use crochet for the back as the tweed yarn was only two ply, I would still be knitting until next year it was so tiny! The effect of the two textures add interest. 


I always use a single crochet to stitch the cushion together, it makes a lovely edge and creates more of a contrast between the crochet back and the knitted front


As each stitch is worked together it makes the finish tidier. 


The button edging was created afterwards using crochet which handles buttonholes easier than knitting techniques. I also added a slight curve / frill to the edge. 


The crochet back is wider to create a pillowcase effect, folding over inside covering the cushion. 


While I enjoyed this project - I could not help but consider how expensive it is to knit or crochet, the wool was approximately £7 per ball! I used two balls for this project but fortunately I had the buttons in my own button box. 

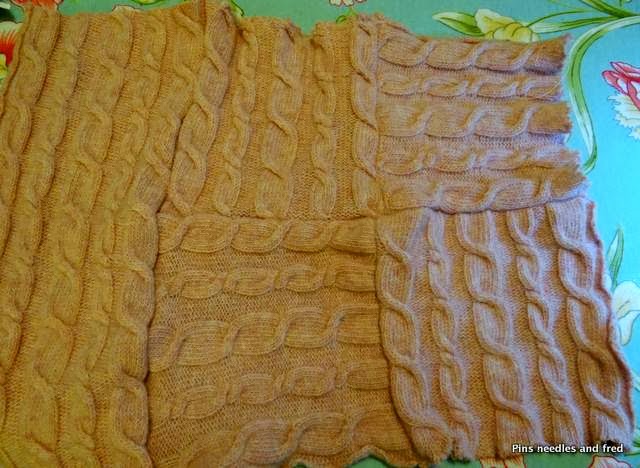
So when I came across a cable scarf in a charity shop it gave me an idea.....


This cable cushion is made like a patchwork quilt with the cable squares rotated at 90 degrees. 


I zigzag stitched the edges to prevent the kitting from fraying and then used one longer piece as a flap for the back. 


I wanted a contrasting back re-using this old white jumper. The bottom edge meant I could use it for the opening - there was no need to hem the open edge. 


The back looks like this - and this cushion was made for £5. I love up cycling - it gives me a real thrill. 


A great source for cabling instructions and lots of knitting techniques can be found here

Saturday, 26 October 2013

Sew Vintage


I have a passion for vintage tea cups and when I spotted this one at a local  craft fair I could not resist. This is not just a tea cup: lift the pincushion lid and you will discover a little sewing kit.


The needle case is a needle felted jammy dodger; there is also a reel of cotton and a tiny pair of scissors! 


I leave the needles treaded: one with white cotton and one with black ready for the little emergency sewing - the time you want to go out in your favourite dress and the hem has come down, or a button pops off at the last minute, this little sewing kit is ready and waiting. 


The little needle felted jammy dodger is easy and fun to do, the tutorial will be on here soon if you fancy making your own. 


Monday, 21 October 2013

Cloth Kits Sewing Bee


One of the wonderful things about living in West Sussex is that there are four marvellous fabric shops in Chichester, one of which is Clothkits. The brand started in the late sixties was hugely popular with printed fabric patterns for children and adults alike - it was bought by a large company in the eighties and remained dormant for 17 years until Kay Mawer rescued it and opened the ClothKits shop in Chichester. It is absolutely wonderful, old patterns that brought back nostalgic memories of childhood sewing, combine with a beautiful vibrant collection of patterns that have brought the brand on trend for the current wave of stitchers. 

So when this invitation from Cloth Kits arrived in my mailbox I could not resist 

Become a SEWING BEE!    
Professional Finishing Techniques for Dressmaking

Can you already sew?Join Maria Pulley and learn some top tips for turning your sewing into something to be proud of!

This hands on one day workshop will equip you with a bundle of professional techniques in dressmaking. 


The course tutor Maria Pulley was an inspiration as soon as she stepped into the spacious workroom - she was wearing a wool dress of her own design that was beautiful and fitted her  like a glove. 

Maria began the course by asking us about our sewing skills and what we wanted out of the course - she was willing to adapt the course structure to meet our needs.  We were quite a range of skills from beginner to more experienced, yet everyone was thrilled to be learning - and the work room was a buzz of enthusiasm. 

The classroom environment was perfect: large, bright and cheery, each student (8 of us in all) had a machine to ourselves the aspects of the machine were explained to us so that we all felt confident. The large cutting out table gave another working area where Maria explained the techniques together with a huge box of material scraps for us to practise on. Instruction sheets for each technique that were very clear in by the end of the afternoon each student had completed samples to go with each hand out. 


Closed seam - overlocked edge


Understitched facing on curved edge - the understitching does really make a huge different to the finish 


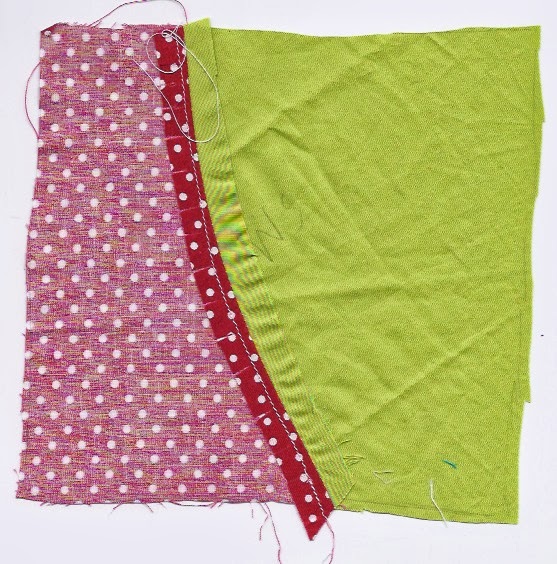
Two curved edges - this technique is very useful for princess seams in particular


Open seam with top stitching along both sides


Piped seam these were beautiful and easy to accomplish


closed seam with top stitching - topstitching looks lovely but precision is key


French seam - right and wrong side  these are useful in lingerie or sheer fabrics, or if you want to encase raw edges. They are a wonderful finish which makes a dress superior to off the peg garments. 


Welt pocket / buttonhole - I have wanted to learn this technique for a long time, I simply adore the effect and it makes a button hole a feature. 


I would recommend the classes,  they are superb value, the class size was just right together with a  constant supply of hot drinks kept us refreshed. I can't wait to enrol for another course. Maria was a very talented seamstress and teacher. I have been sewing now for over 20 years, but I learned so much, Maria made sure everyone went home confident and enthusiastic. 


Follow this blog with bloglovin

Follow on Bloglovin