Friday, 17 October 2014

A peek at the studio

I am in the process of setting up a new studio, which is very exciting, but first I thought I would share my little studio space I have in my small flat.

My first studio was a large summer house at the bottom of the garden, I was studying at the time and my children were teenagers so it was the easiest way to find sanctuary to write my essays! 
It was featured in Prima Magazine and I was very proud of it. 


This beauty holds zippers, sequins and metallic embroidery threads.


When I moved to my little flat I decided that the second bedroom would make a great studio. 
I had a magnificent find in a charity furniture shop, three large Ikea bookshelves for £30! 

They run almost the whole length of the wall, 
but it makes it ideal to keep lots of things close and handy. 


I love books, here is a small part of my crafty ones

I have a large selection of crafting books, the oldest one is from the 1930's 
I love to be inspired by craft books although I struggle to follow a pattern
Usually I adapt it in some way. 


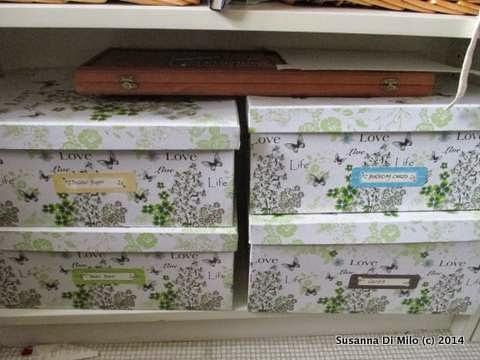
I am a huge fan of beautiful boxes, I like everything neat and tidy 
but labels are essential when the boxes all look the same! 
these contain paper, birthday cards and embellishments 
the wooden case holds pastels.


You can just get a glimpse of the wicker picnic baskets at the top of the shelves, 
I have a whole basket of felt. 
I love jars, and embellish them with glitter and glue before storing 
buttons and bows. 
The vintage quality street tin contains a lot of crayons
and the basket has a lot of cherry blossom 
flowers for a project I have in mind. 


This little wicker basket set is perfect for all the clutter bug stencils 
and the boxes alongside hold computer leads for my embroidery machine, 
and pots of acrylic paints.


The big oval contains a huge muddle of bias binding and ribbon
the suitcases contain zips, Rubber stamps, embroidery wool, 
felting fleece, gadgets and gizmos. 
The pretty shoe boxes contain some vintage sewing items and metallic pens. 


The large box at the bottom is where I keep magazine cuttings of inspiring pictures, 
the two books store all my sewing machine accessories like feet, bobbins and frames. 


Button tins, sewing boxes and cutter bug all jumble together. 
The small tins store buttons, cable needles and feathers! 


I like to keep things in boxes so that they are handy when I am in the middle of something. 
I have most of my fabric and other larger items in storage, 
so I am able to work in a clear space. 

The walls of the studio are white and the wall opposite has a large mood board 
for things that inspire me. Photos from holiday, quotations 
together with postcards and cards that are like small works of art. 

I also have a large corner desk that takes up about a third of the little room, 
with a lovely northern light. 

I would be interested to see your little workspace... 

ttfn xx 
Monday, 13 October 2014

Book Review - Sweet Shop of Dreams


Oh the weather outside is frightful, but the fire is so delightful.... its the time of year for snuggling down with a good book. We have spent a couple of Sunday afternoons companionably reading; the ticking of the clock being the only sound to compete with the beating of the rain on the windows. One of us will break to make a pot of tea - usually there's some cake or other. 

I read many books at once: a lot of spiritual development books that simply cannot be read in one go, sometimes it is nice just to read something that is not to taxing. 

This book is a lovely read, the main character, Rosie, is very endearing, she leaves behind a rather grey existence in London to travel to a remote village in Darbyshire to tend to her elderly aunt, Lillian. 

Alongside the Rosie's tale is Lillian's story of lost love, a wartime romance that was never given the chance to grow. I found Lillian's story deeper and somehow more substantial than Rosie's comical exploits as she comes to term with living in a strange place. 

There appears to be a quotations from a 'book about sweets' with most of the chapters having a page dedicated to a particular type of sweet - old fashioned ones, fudge, liquorish etc. It is never quite clear if this is Lillian's writing or simply quotations from an old book. With all three being separate it made it rather difficult at first to get into the story, but by the middle I became used to the disjointed nature. 

While it is a fairly satisfying read, I felt that it could have been better. I was waiting for Rosie and Lillian to bond, but oddly enough they never really have a good conversation. I found it most odd that Rosie arrived at Lillian's house late in the evening and the following morning Rosie simply gets up and leaves the house to explore. I found that a little unbelievable, it would be incredibly rude so the relationship between these characters never really establishes itself. Rosie does nurse Lillian, but they are kept apart, the writer even resorts to conversations held on a child monitor. 

I imagined some form of connection between old and young, with Lillian tutoring Rosie in the art of sweet making, but all that happens is that Rosie simply orders sweets from suppliers. The sweetshop could have been far more magical. The sudden emergence of another character to help run the shop so that Rosie can spend time with her man seemed a bit too easy. 

I miss Mauve Binchy, she would have really brought the characters alive, I used to end her books feeling I was saying goodbye to dear friends, but I did not have that connection with Rosie or Lillian. 

Its an enjoyable quick read, like eating a boiled sweet, nice while it lasts but not really substantial, but then that is what Chick Lit is after all. 

ttfn x


Friday, 10 October 2014

Oops! Darn it!


There I am in the middle of my current project for a workshop at Eternal Maker, when suddenly I realise that I have cut through the largest piece of my project! Accidents happen and while it might be frustrating (the perfectionist in me says buy more material and start again) the realist in me says that its repairable. Ok so not perfect, but then its an opportunity to share a repair technique with you. 

I have used it on clothing and it has been surprisingly invisible, one of my favourite gypsy skirts got caught up in the chain of my bicycle and ripped. After repairing it this way, I was able to wear it again and as the fabric was patterned, no-one noticed (or if they did they were too polite to say!). 


The important thing is to prevent the ragged edges from fraying. 
Thankfully, iron on interfacing includes a heat activated glue that will seal off the edges nicely. 

Match your interfacing colour, use black on dark colours and white on light colours. 

Cut enough so that the piece has at least a 1cm allowance all around the cut. 

Iron the wrong side of the fabric, drawing the edges together as closely as possible.

Lay the interfacing on top, then a pressing cloth (if you prefer your iron to be free from glue)  

Press the iron firmly and try not to move it around. (movement will shift the frayed edges). 

Allow to cool slightly before moving the item so that the glue can set. 


This is the stitch display on my sewing machine, look for something similar. 

Stitch 22, 23, or 24 are all forms of darning stitches. 

If you don't have multiple stitches then use a zigzag stitch set to a medium width and short length. 

The important thing is to get the right matching thread. 


I find it easier to use an appliqué foot
so I can see the edge and ensure the stitches bridge the cut.

If you use a normal foot just make sure the cut edge runs along the front groove guide. 

Allow the machine to go at its own pace, it will be slower than a straight stitch. 


While this close up shows the stitching its not quite so bad as it looks. 

I will post the project later and you will see for yourself. 

ttfn x 


Wednesday, 8 October 2014

Ode to Autumn - Make your own Harvest Wreath


I really enjoy walking my dog, we follow a path along a hedgerow and it is a real pleasure to see how much this changes over the seasons. It reminds me of school projects, collecting leaves from the nearby woods, the seasonal displays that seemed to create a wonderful rhythm with nature. 

Last year I was enthralled by the pretty shapes of the ivy leaves and they inspired me to make a winter wreath. This September the hedgerows are full of fruit and berries, the hawthorne berry looks so bright and cheery, blackberries abound but its the shapes of the foliage that catches my eye. Filigree leaved ferns, the flowers of the ivy, the marvellous variety of shapes of the leaves from oak to maple. 


These tiny crab apples simply spill from every branch, in clusters of tiny apple perfection - 
they seem like food for fairies. 

The wheat has gone, leaving behind stalks and dry earth but I felt inspired to pay homage to Autumn and create my very own Harvest Wreath. Salt dough is the perfect medium, as bread distorts the shape as it proves. It also means that I can keep the wreath to display next year if I want. 


Make a dough using half salt to flour, (I used two cups of flour and one cup of salt) 


Add enough water to make a dough and then divide it into three. 
Put two lumps of dough in a plastic bag until needed to prevent the dough drying out. 


Roll out with a rolling pin until about 0.5cm 1/2 inch, thick
Use a saucer or side plate to create a circle template. 


Then add a handle, (you can use the plate edge to create smooth curves) 
cut away the excess dough.
 Place the plaque carefully on a baking tray lined with parchment. 


Roll out sausages of dough in long thin strips and cover the 'handle' area. 
dampening the area with a little water to stick the strips to the base. 

Make a little bow at the curve and add a little mouse if you like. 


Place two paperclips with their closed end overhanging the base 
at the 11o'clock and 1 o'clock positions. 
Place a little dough over the top to seal them
ensuring there is enough visible to allow you to hang the plaque

Make the ears of corn: make a small sausage about 1cm half an inch long, 
snip along the sides with small scissors. 
Dampen the base a little with water, lay the corn down starting from the outside and 
working towards the centre. 
You can make bigger/smaller ears of corn if needed to fill gaps. 


When your dough model is complete place in a low oven until hard. 
Depending on your oven it can take hours or left overnight. 

If it doesn't brown up as much as you like you can use watercolour paints
or felt tips to highlight areas. 
When you are happy, seal with a spray varnish. 


Hang your plaque somewhere you will enjoy seeing it, 
but protect it from excess moisture otherwise it will crumble. 

ttfn x 


Butter whirls Recipe


Oh my! the weather has changed considerably in the last few days, gone are the balmy sunny days of September with all the fruitful abundance, to the chill wet rain of October - I want to spend time in my warm, kitchen listening to the rain and hail splat against the window, enhancing the cosiness of baking and domestic bliss. 

A dear friend of mine was having a coffee morning so I made these butter whirls to take along, they are so easy to make and they look so pretty. 


150g of softened butter
50g icing sugar
2 teaspoons of vanilla paste
100g of plain flour
50g of rice flour (or you can use all plain flour) 


Cream the butter and sugar together until they are light and fluffy, its best done with a mixer to save aching arms! Stir in the flour but teat it lightly otherwise you might lose all the air. 


Place mixture into a piping bag fitted with a large gage star nozzle. 
Pipe onto a greased baking tin, in small swirls. 
Its a good idea to keep the swirls tall, as the mixture spreads out in the oven. 
Put a cherry on the top and bake in a moderate oven (160/325 GM3) around 20 minutes 
or until pale and golden. 


You can be even more indulgent by adding a little jam and butter icing to make a biscuit sandwich, they will look like home made Viennese whirls. Or you can dip one side in chocolate... now that is a thought... ttfn x


Follow this blog with bloglovin

Follow on Bloglovin